


BIOS passwords can add an extra layer of security for desktop and laptop computers. They are used to either prevent a user from changing the BIOS settings or to prevent the PC from booting without a password. Unfortunately, BIOS passwords can also be a liability if a user forgets their password, or changes the password to intentionally lock out the corporate IT department. Sending the unit back to the manufacturer to have the BIOS reset can be expensive and is usually not covered in the warranty. Never fear, all is not lost. There are a few known backdoors and other tricks of the trade that can be used to bypass or reset the BIOS.
Backdoor passwords
Many BIOS manufacturers have provided backdoor passwords that can be used to access the BIOS setup in the event you have lost your password. These passwords are case sensitive, so you may wish to try a variety of combinations. Keep in mind that the key associated to "_" in the US keyboard corresponds to "?" in some European keyboards. Laptops typically have better BIOS security than desktop systems, and we are not aware of any backdoor passwords that will work with name brand laptops.
WARNING: Some BIOS configurations will lock you out of the system completely if you type in an incorrect password more than 3 times. Read your manufacturers documentation for the BIOS setting before you begin typing in passwords
Award BIOS backdoor passwords:
ALFAROME ALLy aLLy aLLY ALLY aPAf _award AWARD_SW AWARD?SW AWARD SW AWARD PW AWKWARD awkward BIOSTAR CONCAT CONDO Condo d8on djonet HLT J64 J256 J262 j332 j322 KDD Lkwpeter LKWPETER PINT pint SER SKY_FOX SYXZ syxz shift + syxz TTPTHA ZAAADA ZBAAACA ZJAAADC 01322222
589589 589721 595595 598598
AMI BIOS backdoor passwords:
AMI AAAMMMIII BIOS PASSWORD HEWITT RAND AMI?SW AMI_SW LKWPETER A.M.I. CONDO
PHOENIX BIOS backdoor passwords:
phoenix, PHOENIX, CMOS, BIOS
MISC. COMMON PASSWORDS
ALFAROME BIOSTAR biostar biosstar CMOS cmos LKWPETER lkwpeter setup SETUP Syxz Wodj
OTHER BIOS PASSWORDS BY MANUFACTURER
Manufacturer Password
VOBIS & IBM merlin
Dell Dell
Biostar Biostar
Compaq Compaq
Enox xo11nE
Epox central
Freetech Posterie
IWill iwill
Jetway spooml
Packard Bell bell9
QDI QDI
Siemens SKY_FOX
TMC BIGO
Toshiba Toshiba
TOSHIBA BIOS
Most Toshiba laptops and some desktop systems will bypass the BIOS password if the left shift key is held down during boot
IBM APTIVA BIOS
Press both mouse buttons repeatedly during the boot
Password cracking software
The following software can be used to either crack or reset the BIOS on many chipsets. If your PC is locked with a BIOS administrator password that will not allow access to the floppy drive, these utilities may not work. Also, since these utilities do not come from the manufacturer, use them cautiously and at your own risk.
Cmos password recovery tools 3.1
!BIOS (get the how-to article)
RemPass
KILLCMOS
Using the Motherboard "Clear CMOS" Jumper or Dipswitch settings
Many motherboards feature a set of jumpers or dipswitches that will clear the CMOS and wipe all of the custom settings including BIOS passwords. The locations of these jumpers / dipswitches will vary depending on the motherboard manufacturer and ideally you should always refer to the motherboard or computer manufacturers documentation. If the documentation is unavailable, the jumpers/dipswitches can sometimes be found along the edge of the motherboard, next to the CMOS battery, or near the processor. Some manufacturers may label the jumper / dipswitch CLEAR - CLEAR CMOS - CLR - CLRPWD - PASSWD - PASSWORD - PWD. On laptop computers, the dipswitches are usually found under the keyboard or within a compartment at the bottom of the laptop.
Please remember to unplug your PC and use a grounding strip before reaching into your PC and touching the motherboard. Once you locate and rest the jumper switches, turn the computer on and check if the password has been cleared. If it has, turn the computer off and return the jumpers or dipswitches to its original position.
Removing the CMOS Battery
The CMOS settings on most systems are buffered by a small battery that is attached to the motherboard. (It looks like a small watch battery). If you unplug the PC and remove the battery for 10-15 minutes, the CMOS may reset itself and the password should be blank. (Along with any other machine specific settings, so be sure you are familiar with manually reconfiguring the BIOS settings before you do this.) Some manufacturers backup the power to the CMOS chipset by using a capacitor, so if your first attempt fails, leave the battery out (with the system unplugged) for at least 24 hours. Some batteries are actually soldered onto the motherboard making this task more difficult. Unsoldering the battery incorrectly may damage your motherboard and other components, so please don't attempt this if you are inexperienced. Another option may be to remove the CMOS chip from the motherboard for a period of time.
Note: Removing the battery to reset the CMOS will not work for all PC's, and almost all of the newer laptops store their BIOS passwords in a manner which does not require continuous power, so removing the CMOS battery may not work at all. IBM Thinkpad laptops lock the hard drive as well as the BIOS when the supervisor password is set. If you reset the BIOS password, but cannot reset the hard drive password, you may not be able to access the drive and it will remain locked, even if you place it in a new laptop. IBM Thinkpads have special jumper switches on the motherboard, and these should be used to reset the system.
Overloading the KeyBoard Buffer
On some older computer systems, you can force the CMOS to enter its setup screen on boot by overloading the keyboard buffer. This can be done by booting with the keyboard or mouse unattached to the systems, or on some systems by hitting the ESC key over 100 times in rapid succession.
Jumping the Solder Beads on the CMOS
It is also possible to reset the CMOS by connecting or "jumping" specific solder beads on the chipset. There are too many chipsets to do a breakdown of which points to jump on individual chipsets, and the location of these solder beads can vary by manufacturer, so please check your computer and motherboard documentation for details. This technique is not recommended for the inexperienced and should be only be used as a "last ditch" effort.
Using a professional service
If the manufacturer of the laptop or desktop PC can't or won't reset the BIOS password, you still have the option of using a professional service. Password Crackers, Inc., offers a variety of services for desktop and laptop computers for between $100 and $400. For most of these services, you'll need to provide some type of legitimate proof of ownership. This may be difficult if you've acquired the computer second hand or from an online auction.
DISCLAIMER
This article is intended for IT Professionals and systems administrators with experience servicing computer hardware. It is not intended for home users, hackers, or computer thieves attempting to crack the password on a stolen PC. Please do not attempt any of these procedures if you are unfamiliar with computer hardware, and please use this information responsibly. Technoburst is not responsible for the use or misuse of this material, including loss of data, damage to hardware, or personal injury.
- Use password cracking software
- Reset the CMOS using the jumpers or solder beads.
- Removing the CMOS battery for at least 10 minutes
- Overloading the keyboard buffer
- Using a professional service
Backdoor passwords
Many BIOS manufacturers have provided backdoor passwords that can be used to access the BIOS setup in the event you have lost your password. These passwords are case sensitive, so you may wish to try a variety of combinations. Keep in mind that the key associated to "_" in the US keyboard corresponds to "?" in some European keyboards. Laptops typically have better BIOS security than desktop systems, and we are not aware of any backdoor passwords that will work with name brand laptops.
WARNING: Some BIOS configurations will lock you out of the system completely if you type in an incorrect password more than 3 times. Read your manufacturers documentation for the BIOS setting before you begin typing in passwords
Award BIOS backdoor passwords:
ALFAROME ALLy aLLy aLLY ALLY aPAf _award AWARD_SW AWARD?SW AWARD SW AWARD PW AWKWARD awkward BIOSTAR CONCAT CONDO Condo d8on djonet HLT J64 J256 J262 j332 j322 KDD Lkwpeter LKWPETER PINT pint SER SKY_FOX SYXZ syxz shift + syxz TTPTHA ZAAADA ZBAAACA ZJAAADC 01322222
589589 589721 595595 598598
AMI BIOS backdoor passwords:
AMI AAAMMMIII BIOS PASSWORD HEWITT RAND AMI?SW AMI_SW LKWPETER A.M.I. CONDO
PHOENIX BIOS backdoor passwords:
phoenix, PHOENIX, CMOS, BIOS
MISC. COMMON PASSWORDS
ALFAROME BIOSTAR biostar biosstar CMOS cmos LKWPETER lkwpeter setup SETUP Syxz Wodj
OTHER BIOS PASSWORDS BY MANUFACTURER
Manufacturer Password
VOBIS & IBM merlin
Dell Dell
Biostar Biostar
Compaq Compaq
Enox xo11nE
Epox central
Freetech Posterie
IWill iwill
Jetway spooml
Packard Bell bell9
QDI QDI
Siemens SKY_FOX
TMC BIGO
Toshiba Toshiba
TOSHIBA BIOS
Most Toshiba laptops and some desktop systems will bypass the BIOS password if the left shift key is held down during boot
IBM APTIVA BIOS
Press both mouse buttons repeatedly during the boot
Password cracking software
The following software can be used to either crack or reset the BIOS on many chipsets. If your PC is locked with a BIOS administrator password that will not allow access to the floppy drive, these utilities may not work. Also, since these utilities do not come from the manufacturer, use them cautiously and at your own risk.
Cmos password recovery tools 3.1
!BIOS (get the how-to article)
RemPass
KILLCMOS
Using the Motherboard "Clear CMOS" Jumper or Dipswitch settings
Many motherboards feature a set of jumpers or dipswitches that will clear the CMOS and wipe all of the custom settings including BIOS passwords. The locations of these jumpers / dipswitches will vary depending on the motherboard manufacturer and ideally you should always refer to the motherboard or computer manufacturers documentation. If the documentation is unavailable, the jumpers/dipswitches can sometimes be found along the edge of the motherboard, next to the CMOS battery, or near the processor. Some manufacturers may label the jumper / dipswitch CLEAR - CLEAR CMOS - CLR - CLRPWD - PASSWD - PASSWORD - PWD. On laptop computers, the dipswitches are usually found under the keyboard or within a compartment at the bottom of the laptop.
Please remember to unplug your PC and use a grounding strip before reaching into your PC and touching the motherboard. Once you locate and rest the jumper switches, turn the computer on and check if the password has been cleared. If it has, turn the computer off and return the jumpers or dipswitches to its original position.
Removing the CMOS Battery
The CMOS settings on most systems are buffered by a small battery that is attached to the motherboard. (It looks like a small watch battery). If you unplug the PC and remove the battery for 10-15 minutes, the CMOS may reset itself and the password should be blank. (Along with any other machine specific settings, so be sure you are familiar with manually reconfiguring the BIOS settings before you do this.) Some manufacturers backup the power to the CMOS chipset by using a capacitor, so if your first attempt fails, leave the battery out (with the system unplugged) for at least 24 hours. Some batteries are actually soldered onto the motherboard making this task more difficult. Unsoldering the battery incorrectly may damage your motherboard and other components, so please don't attempt this if you are inexperienced. Another option may be to remove the CMOS chip from the motherboard for a period of time.
Note: Removing the battery to reset the CMOS will not work for all PC's, and almost all of the newer laptops store their BIOS passwords in a manner which does not require continuous power, so removing the CMOS battery may not work at all. IBM Thinkpad laptops lock the hard drive as well as the BIOS when the supervisor password is set. If you reset the BIOS password, but cannot reset the hard drive password, you may not be able to access the drive and it will remain locked, even if you place it in a new laptop. IBM Thinkpads have special jumper switches on the motherboard, and these should be used to reset the system.
Overloading the KeyBoard Buffer
On some older computer systems, you can force the CMOS to enter its setup screen on boot by overloading the keyboard buffer. This can be done by booting with the keyboard or mouse unattached to the systems, or on some systems by hitting the ESC key over 100 times in rapid succession.
Jumping the Solder Beads on the CMOS
It is also possible to reset the CMOS by connecting or "jumping" specific solder beads on the chipset. There are too many chipsets to do a breakdown of which points to jump on individual chipsets, and the location of these solder beads can vary by manufacturer, so please check your computer and motherboard documentation for details. This technique is not recommended for the inexperienced and should be only be used as a "last ditch" effort.
Using a professional service
If the manufacturer of the laptop or desktop PC can't or won't reset the BIOS password, you still have the option of using a professional service. Password Crackers, Inc., offers a variety of services for desktop and laptop computers for between $100 and $400. For most of these services, you'll need to provide some type of legitimate proof of ownership. This may be difficult if you've acquired the computer second hand or from an online auction.
DISCLAIMER
This article is intended for IT Professionals and systems administrators with experience servicing computer hardware. It is not intended for home users, hackers, or computer thieves attempting to crack the password on a stolen PC. Please do not attempt any of these procedures if you are unfamiliar with computer hardware, and please use this information responsibly. Technoburst is not responsible for the use or misuse of this material, including loss of data, damage to hardware, or personal injury.
Wednesday, January 5, 2011
Booting Windows XP faster
Labels: Computer, Windows XP
Follow the steps given below to speed up the booting of windows XP.
1. Open notepad.exe, type "del c:\windows\prefetch\ntosboot-*.* /q" (without the quotes) & save as "ntosboot.bat" in c:\
2. From the Start menu, select "Run..." & type "gpedit.msc".
3. Double click "Windows Settings" under "Computer Configuration" and double click again on "Shutdown" in the right window.
4. In the new window, click "add", "Browse", locate your "ntosboot.bat" file & click "Open".
5. Click "OK", "Apply" & "OK" once again to exit.
6. From the Start menu, select "Run..." & type "devmgmt.msc".
7. Double click on "IDE ATA/ATAPI controllers"
8. Right click on "Primary IDE Channel" and select "Properties".
9. Select the "Advanced Settings" tab then on the device or 1 that doesn't have 'device type' greyed out select 'none' instead of 'autodetect' & click "OK".
10. Right click on "Secondary IDE channel", select "Properties" and repeat step 9.
11. Reboot your computer.
Best Keyboard Shortcuts
Labels: Computer, Windows XP

Getting used to using your keyboard exclusively and leaving your mouse behind will make you much more efficient at performing any task on any Windows system. I use the following keyboard shortcuts every day:
Windows key + R = Run menu
This is usually followed by:
cmd = Command Prompt
iexplore + "web address" = Internet Explorer
compmgmt.msc = Computer Management
dhcpmgmt.msc = DHCP Management
dnsmgmt.msc = DNS Management
services.msc = Services
eventvwr = Event Viewer
dsa.msc = Active Directory Users and Computers
dssite.msc = Active Directory Sites and Services
Windows key + E = Explorer
ALT + Tab = Switch between windows
ALT, Space, X = Maximize window
CTRL + Shift + Esc = Task Manager
Windows key + Break = System properties
Windows key + F = Search
Windows key + D = Hide/Display all windows
CTRL + C = copy
CTRL + X = cut
CTRL + V = paste
Also don't forget about the "Right-click" key next to the right Windows key on your keyboard. Using the arrows and that key can get just about anything done once you've opened up any program.
Keyboard Shortcuts
[Alt] and [Esc] Switch between running applications
[Alt] and letter Select menu item by underlined letter
[Ctrl] and [Esc] Open Program Menu
[Ctrl] and [F4] Close active document or group windows (does not work with some applications)
[Alt] and [F4] Quit active application or close current window
[Alt] and [-] Open Control menu for active document
Ctrl] Lft., Rt. arrow Move cursor forward or back one word
Ctrl] Up, Down arrow Move cursor forward or back one paragraph
[F1] Open Help for active application
Windows+M Minimize all open windows
Shift+Windows+M Undo minimize all open windows
Windows+F1 Open Windows Help
Windows+Tab Cycle through the Taskbar buttons
Windows+Break Open the System Properties dialog box
Bandwidth Explained
Labels: Computer, Internet, Tech Updates

Most hosting companies offer a variety of bandwidth options in their plans. So exactly what is bandwidth as it relates to web hosting? Put simply, bandwidth is the amount of traffic that is allowed to occur between your web site and the rest of the internet. The amount of bandwidth a hosting company can provide is determined by their network connections, both internal to their data center and external to the public internet.
Network Connectivity
The internet, in the most simplest of terms, is a group of millions of computers connected by networks. These connections within the internet can be large or small depending upon the cabling and equipment that is used at a particular internet location. It is the size of each network connection that determines how much bandwidth is available. For example, if you use a DSL connection to connect to the internet, you have 1.54 Mega bits (Mb) of bandwidth. Bandwidth therefore is measured in bits (a single 0 or 1). Bits are grouped in bytes which form words, text, and other information that is transferred between your computer and the internet.
If you have a DSL connection to the internet, you have dedicated bandwidth between your computer and your internet provider. But your internet provider may have thousands of DSL connections to their location. All of these connection aggregate at your internet provider who then has their own dedicated connection to the internet (or multiple connections) which is much larger than your single connection. They must have enough bandwidth to serve your computing needs as well as all of their other customers. So while you have a 1.54Mb connection to your internet provider, your internet provider may have a 255Mb connection to the internet so it can accommodate your needs and up to 166 other users (255/1.54).
Traffic
A very simple analogy to use to understand bandwidth and traffic is to think of highways and cars. Bandwidth is the number of lanes on the highway and traffic is the number of cars on the highway. If you are the only car on a highway, you can travel very quickly. If you are stuck in the middle of rush hour, you may travel very slowly since all of the lanes are being used up.
Traffic is simply the number of bits that are transferred on network connections. It is easiest to understand traffic using examples. One Gigabyte is 2 to the 30th power (1,073,741,824) bytes. One gigabyte is equal to 1,024 megabytes. To put this in perspective, it takes one byte to store one character. Imagine 100 file cabinets in a building, each of these cabinets holds 1000 folders. Each folder has 100 papers. Each paper contains 100 characters - A GB is all the characters in the building. An MP3 song is about 4MB, the same song in wav format is about 40MB, a full length movie can be 800MB to 1000MB (1000MB = 1GB).
If you were to transfer this MP3 song from a web site to your computer, you would create 4MB of traffic between the web site you are downloading from and your computer. Depending upon the network connection between the web site and the internet, the transfer may occur very quickly, or it could take time if other people are also downloading files at the same time. If, for example, the web site you download from has a 10MB connection to the internet, and you are the only person accessing that web site to download your MP3, your 4MB file will be the only traffic on that web site. However, if three people are all downloading that same MP at the same time, 12MB (3 x 4MB) of traffic has been created. Because in this example, the host only has 10MB of bandwidth, someone will have to wait. The network equipment at the hosting company will cycle through each person downloading the file and transfer a small portion at a time so each person's file transfer can take place, but the transfer for everyone downloading the file will be slower. If 100 people all came to the site and downloaded the MP3 at the same time, the transfers would be extremely slow. If the host wanted to decrease the time it took to download files simultaneously, it could increase the bandwidth of their internet connection (at a cost due to upgrading equipment).
Hosting Bandwidth
In the example above, we discussed traffic in terms of downloading an MP3 file. However, each time you visit a web site, you are creating traffic, because in order to view that web page on your computer, the web page is first downloaded to your computer (between the web site and you) which is then displayed using your browser software (Internet Explorer, Netscape, etc.) . The page itself is simply a file that creates traffic just like the MP3 file in the example above (however, a web page is usually much smaller than a music file).
A web page may be very small or large depending upon the amount of text and the number and quality of images integrated within the web page. For example, the home page for CNN.com is about 200KB (200 Kilobytes = 200,000 bytes = 1,600,000 bits). This is typically large for a web page. In comparison, Yahoo's home page is about 70KB.
How Much Bandwidth Is Enough?
It depends (don't you hate that answer). But in truth, it does. Since bandwidth is a significant determinant of hosting plan prices, you should take time to determine just how much is right for you. Almost all hosting plans have bandwidth requirements measured in months, so you need to estimate the amount of bandwidth that will be required by your site on a monthly basis
If you do not intend to provide file download capability from your site, the formula for calculating bandwidth is fairly straightforward:
Average Daily Visitors x Average Page Views x Average Page Size x 31 x Fudge Factor
If you intend to allow people to download files from your site, your bandwidth calculation should be:
[(Average Daily Visitors x Average Page Views x Average Page Size) +
(Average Daily File Downloads x Average File Size)] x 31 x Fudge Factor
Let us examine each item in the formula:
Average Daily Visitors - The number of people you expect to visit your site, on average, each day. Depending upon how you market your site, this number could be from 1 to 1,000,000.
Average Page Views - On average, the number of web pages you expect a person to view. If you have 50 web pages in your web site, an average person may only view 5 of those pages each time they visit.
Average Page Size - The average size of your web pages, in Kilobytes (KB). If you have already designed your site, you can calculate this directly.
Average Daily File Downloads - The number of downloads you expect to occur on your site. This is a function of the numbers of visitors and how many times a visitor downloads a file, on average, each day.
Average File Size - Average file size of files that are downloadable from your site. Similar to your web pages, if you already know which files can be downloaded, you can calculate this directly.
Fudge Factor - A number greater than 1. Using 1.5 would be safe, which assumes that your estimate is off by 50%. However, if you were very unsure, you could use 2 or 3 to ensure that your bandwidth requirements are more than met.
Usually, hosting plans offer bandwidth in terms of Gigabytes (GB) per month. This is why our formula takes daily averages and multiplies them by 31.
Summary
Most personal or small business sites will not need more than 1GB of bandwidth per month. If you have a web site that is composed of static web pages and you expect little traffic to your site on a daily basis, go with a low bandwidth plan. If you go over the amount of bandwidth allocated in your plan, your hosting company could charge you over usage fees, so if you think the traffic to your site will be significant, you may want to go through the calculations above to estimate the amount of bandwidth required in a hosting plan.
Saturday, November 13, 2010
Parallel Port Programming In Turbo C++ Part 1
Labels: Computer, Electronics, Parallelport, Programming
Initial preparations: Before getting your hands dirty with coding, you have to do some thing to make these parallel port programs work well. Windows XP users will have to copy the file " MSWINSCK.OCX " into the folder c:/windows/system32.
In Turbo C++ functions for handling parallel port communication are held in the header file " dos.h" . Various functions required for parallel port are listed below.
inport reads a word from a hardware port.
inportb reads a byte from a hardware port.
outport outputs a word to a hardware port.
outportb outputs a byte to a hardware port.
INPORT is used for word by word reception. The syntax is as follows:
inport (portid);
here portid is the address of the port. For parallel port the address is 0x378. For example
int result;
result=inport( 0x378 );
this will read the word of data from the parallel port and will be stored in the variable result.
INPORTB is used for byte by byte reception. The syntax is as follows:
inportb (portid)
For example
unsigned char result;
result = inportb(0x378);
this will read a byte from the port and will be saved in the variable result.
OUTPORT is used to output a word to the port. The syntax is as follows:
outport (portid,value);
here value is the data for output. For example
int value =450;
outport(0x378,value);
this will output the data 450 to the parallel port.
OUTPORTB is used to output a single byte to a port. The sysntax is as follows:
outportb (portid, value);
For example
outportb (0x378,255);
this will output the data 255 to the parallel port.
Download Sample Programs
Tuesday, November 9, 2010
uClinux for your Embedded Linux Projects
Labels: Computer, Electronics, Linux, Tech Updates
Linux is getting penetrated into the area of embedded systems. The main pushing factors are
- It is open source.
- Free to copy and use.
- Wide support.
- High flexibility and the ability to extend upon itself.
uClinux is developed to run on microcomputers and micro controllers. The original uClinux was a derivative of Linux 2.0 kernel intended for microcontrollers without Memory Management Units (MMUs). However, the Linux/Microcontroller Project has grown both in brand recognition and coverage of processor architectures.It targets classic embedded 32bit micro-controllers. Main features are
- open source project
- stable versions based on Linux kernels 2.0.39, 2.4.27 and 2.6.10
- most features of Linux kernel available:
- process control
- filesystems
- networking
- device drivers
- filesystems
- networking
- device drivers
- modified kernel memory subsystem
- conventional kernel/application separation
Various supported CPU architectures are
- Motorola 68k (68X302, 68306, 68X328, 68332, 68360)
- Motorola ColdFire (5206x, 5249, 527x, 5307, 5407)
- ARM (Atmel, NetSilicon, Aplio, TI, Samsung, ...)
- Sparc (LEON)
- MIPS (Brecis, ...)
- Xilinx Microblaze (FPGA)
- Altera NIOS (FPGA)
- NEC v850
- Hitachi H8/300, SH2
Web Resources
Monday, November 8, 2010
Hacking Indian Electronic Voting Machines
Labels: Computer, Electronics, Tech Updates
At present India, world's second largest populated nation is using Electronic Voting Machines (EVM) for the almost all the elections around the nation, including national elections. As far as various related parameters are considered this adaption is quite justifiable. This immensly reduces the time of counting votes and publication of results. Till now Election Commision of India had approved the security provided by the EVM's. But are theses EVM's fully secure?
A couple of months back Mr. Hari. K. Prasad, managing director of Netindia (p) Ltd., a Hyderabad based research and development firm demonstrated the hacking of Indian EVM's. In 2009, the Election Commission of India publicly challenged Prasad to demonstrate that India’s EVMs could be tampered with, only to withhold access to the machines at the last minute. He took up the challenge and finally he hacked the EVM's along with his colleagues.
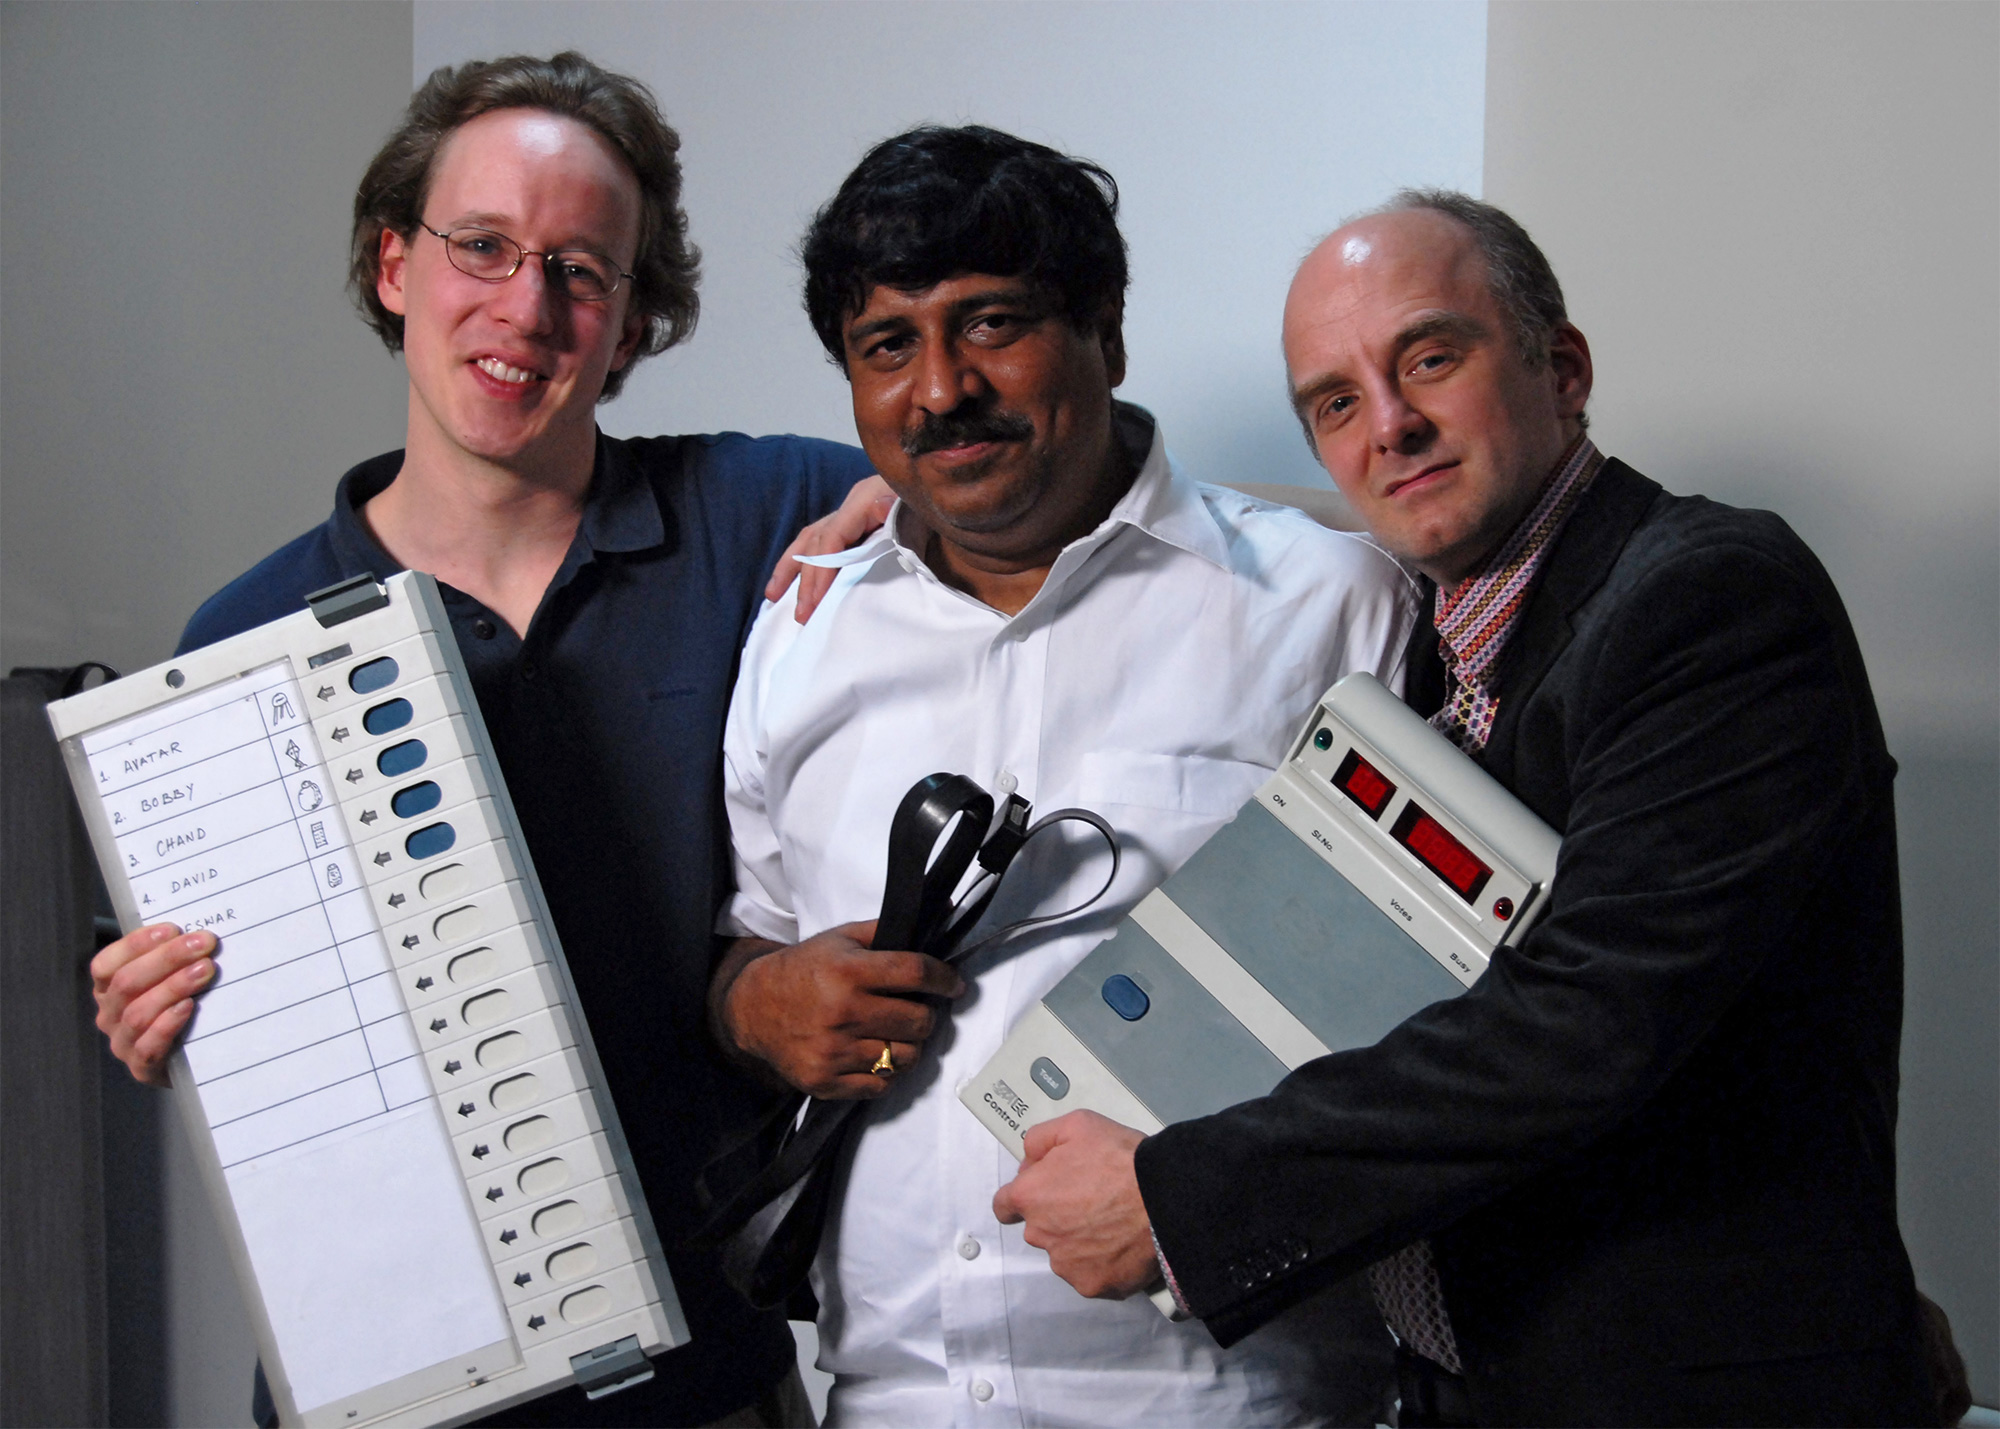
He demostrated various methods of hacking EVM's and questioned its credibility. Also he was able to remotely manipulate the results from his mobile phone. For this he used a mobile phone running Adroid OS and a custom software. He said that EVM design is so simple such that even encrypion is not used for data security. He also pointed out that many countries have aborted EVM's due to security reasons. He aslso suggested possible solutions for this issue. One is to redesign the EVM's with enhanced security features and the other is to return to ballot papers.
You can get complete technical details about this hacking from the wesite: www.indiaevm.org
Thursday, October 21, 2010
Online Content Archiving Using Memonic
Labels: Computer, Internet, Tech Updates

Content archiving and online note creating/sharing tools are growing rapidly accross the net. Archiving on-line content for accessing at a later stage with ease is essential for anyone doing research with net. Generally archiving tools help us obtain website content - either as a complete or specific part of it- and store them under specific topic categories.
Of course all the collected information are stored online, the archivied content can be accessed any time any where.There are many tools such as Diigo, Evernote, Memonic etc. Memonic (http://www.memonic.com)is discussed here.Memonic , besides helping us to archieve our data in an easily retrievable fashion, the service allows us to attach notes with each of the items being archived.
 Use of memonic requires no software installation. You just need to use the bookmarklet offered by the service. First drag the bookmarklet button on to your browser toolbar and make it 'memonic' ready. Now, whenever you need to capture the web contenmt, just click on this button and the service in turn will load all the required tools to capture and archive web content. In addition to archiving and annotating web content, memonic enables sharing it with your friends /public.
Besides archiving content from the web ,you may need to archive contents from other windows application (like word/excel) as well. Memonic takes care of these need also. The facility to post archival content via e-mail is yet another advantage.
Recovering Deleted Files Using Recuva
Labels: Computer, Tech Updates, Windows XP

At some point of our life we might have wished to recover our deleted files. Whether it may be Pictures,Documents,Videos,Memory card data,e-mails or even your entire hard disk, Recuva from Piriform comes for your aid.With Recuva you can get them back quickly, safely and easily. This compact Windows program does the work for you, scanning your drives for the files you need, then recovering them in a flash.This is definitely a free software.
It is highly user friendly and simple to use. Also it is fast. I was able to recover a 120k .jpg file with 100% accuracy within few minutes.I recommend this for all.
Other exciting features are
- Recovery from damaged or formatted disks
- Recover deleted emails
- Recover deleted iPod music
- Restore unsaved Word documents
- Quick-Start Wizard
- Deep Scan
- Securely delete files you want to erase foreve
- Securely delete files you want to erase forever
- Portable version
- Full Windows OS support and many languages
Experience Browser Cloud Service With Spoon Browser Sandbox
Labels: Computer, Tech Updates

IE is slowly losing ground and as per this 'Statcounter' report, its market share has fallen below 50 percent recentely (http://gs.statcounter.com/press/microsoft-internet-explorer-browser-falls-below-50-perc-0f-worldwide-market-for-first-time).
Though at present a plethora of browser choices are available, one may not have the time or inclination to install/try out all of them. In case you wish to experience different type of browsers without having to install them, take a look at thye browser cloud service offered at spoon.net (http://www.spoon.net/Browsers/). By just installing a small plugin, Spoon.net allows you to run a range of browsers that include, different vrsions of IE, FireFox, Chrome, Opera and Safari.
Friday, October 15, 2010
Disabling Wireless LAN in BSNL modems
Labels: Computer, Internet, Tech Updates
BSNL WiFi modems are getting widely deployed these days. In these modems Wireless LAN (WLAN ) is activated by default. It is better to turn it of if you are not using it. Because if you left your WLAN ON without any password protection it can make some security issues.
To check whether your WLAN is ON/OFF, check the status of the LED indicator below the WLAN in front of your WiFi modem. If it is ON, WLAN is active, otherwise it is deactivated.
To disable WLAN follow the steps below:
- Switch ON the modem.
- Open up your browser and type " 192.168.1.1" without quotes in the address bar.
- It will prompt for your username and password. If you don't know these, contact BSNL.
- Once user name and password are given it will take you to DSL router.Now select the wireless option on the left side.
- In the page which opened, you will find a check box to enable /disable WLAN. Uncheck it to disable WLAN.
- Now click on save/apply button at the bottom of the page.
- That's all. Your WLAN is now deactivated.
- You may confirm this by checking the status of the LED below WLAN on the modem.
Thursday, October 14, 2010
Hard Disk Clean Up
Labels: Computer, Windows XP
The Disk Cleanup tool helps you free up space on your hard disk by searching your disk for files that you can safely delete. You can choose to delete some or all of:
 Launch Disk Cleanup via Start - All Programs - Accessories - System Tools.
 A dialogue window will appear enabling you to select the drive you want to clean up.Select the required drive and click OK.
 The specified drive is examined...
... and the amount of space you can potentially free up calculated.
The results, showing the amount of space that can be recovered by deleting different areas and files, are then displayed on the Disk Cleanup tab.

One of the options that isn't checked by default is Compress old files. Checking this will result in files that haven't been used for a while being archived. With this item selected in the list, click Options
 ...... to set a time limit for files to be compressed.
Check the boxes associated with the items you want to delete and click OK.The utility cleans up the specified areas and files.he utility cleans
The More Options tab provides further scope for freeing up disk space.

- temporary Internet files
- downloaded program files, such as ActiveX controls and Java applets
- the Recycle Bin
- temporary Windows files
- optional Windows components that you are not using
- installed programs that you no longer use.
 A dialogue window will appear enabling you to select the drive you want to clean up.Select the required drive and click OK.
 The specified drive is examined...
... and the amount of space you can potentially free up calculated.

One of the options that isn't checked by default is Compress old files. Checking this will result in files that haven't been used for a while being archived. With this item selected in the list, click Options
 ...... to set a time limit for files to be compressed.
Check the boxes associated with the items you want to delete and click OK.The utility cleans up the specified areas and files.he utility cleans
The More Options tab provides further scope for freeing up disk space.

Wednesday, October 13, 2010
FUZOMA
Labels: Computer, Electronics, OS
FUZOMA is a FreeDOS based distribution which can boot from floppy disk , CD, USB, and can convert old, age out computers into educational tools for children.It is actually a collection of dozens of educational programs.
This sort of initiatives are of extreme importance. As the computer and electronics industries are making a technological revolution, the number of old, age out computers are increasing day by day. Most of the people are throwing away their old working computers just for tenology updation. In this context it is good to think about how we can utilize this old computers. This could considerably reduce the e-Wsate. In addition it could also expand the life tome of a computer. FUZOMA is really a good move in this aspect.
Installing FreeDOS in GNU/Linux
FreeDOS is an open source replacement for MS-DOS. We are using th QEMU emulator to install FreeDOS in GNU/Linux. To install QEMU, enter the following command:
sudo apt-get install qemu
Now you need to download the FreeDOS ISO file.
Create a folder for installing FreeDos
mkdir /opt/freedos
In GNU/Linux file is every thing and we can even install an entire OS into a file, the only requirement being the file should be large enough to store what ever is intended to be stored in it.
so create a raw file named freedosfile.img roughly of size 400 MB using the dd command as follows:
cd /opt/freedos
dd if=/dev/zero of=freedosfile.img bs=1024 count=400000
Now to install the FreeDOS use the following command:
qemu -cdrom fdfullcd.iso -hda freedosfile.img -boot d
Now you can see a beautiful splash screen. From the followed menu select to boot from the CDROM. Now again a second menu appears. It gives options to initiate the FreeDOS installation or boot the live CD. At this stage if you are in two minds about installing FreeDOS, you can continue booting from the CD and in a few seconds will be placed in a FreeDOS shell.
To install FreeDOS on your hard disk select the option for installation.
Installation steps for FreeDOS
It will take about 15-20 minutes to install all the packages. Then FreeDOS starts configuring the parameters. Next it will prompt us to choose a packet driver. There is a packet driver for Qemu provided which we can select. Following which it will be prompted to install the OpenGEM GUI.
Starting to use FreeDOS in GNU/Linux
Shortly you will be placed into c prompt
That's all
Enjoy the power of FreeDOS in your system.
sudo apt-get install qemu
Now you need to download the FreeDOS ISO file.
Create a folder for installing FreeDos
mkdir /opt/freedos
In GNU/Linux file is every thing and we can even install an entire OS into a file, the only requirement being the file should be large enough to store what ever is intended to be stored in it.
so create a raw file named freedosfile.img roughly of size 400 MB using the dd command as follows:
cd /opt/freedos
dd if=/dev/zero of=freedosfile.img bs=1024 count=400000
Now to install the FreeDOS use the following command:
qemu -cdrom fdfullcd.iso -hda freedosfile.img -boot d
Now you can see a beautiful splash screen. From the followed menu select to boot from the CDROM. Now again a second menu appears. It gives options to initiate the FreeDOS installation or boot the live CD. At this stage if you are in two minds about installing FreeDOS, you can continue booting from the CD and in a few seconds will be placed in a FreeDOS shell.
To install FreeDOS on your hard disk select the option for installation.
Installation steps for FreeDOS
- Select your language and keyboard layout.
- Prepare the hard disk for FreeDOS 1.0 final by running XFDISK. You can also create a floppy boot disk at this juncture.
Since the hard disk that freedos recognises is actually a file freedosfile.img which we passed via the command line, it is better to chose to create a single primary partition encompassing the whole file (disk). Once the partition was created, pressing F3 wrote the changes and prompted me to restart the computer - which of course is the emulator Qemu. The right thing to do here is to press Yes and the same boot process takes place as earlier and in a short time it provide a menu prompt asking to format the hard disk (the file) with fat32 file system. - Next the installer prompts to continue with the installation which includes :
- agreeing to an end user licence (GPL)
- installing the packages. Here we have the option of providing an alternate path to install, the default path being 'C:\fdos'.
The FreeDOS OS is split into 10 packages each pertaining to a particular aspect of the OS. They are as follows:
- base - Essential DOS utilities which reproduce the functionality of MS-DOS
- compress - Free file compression and decompression utilities (7zip, arj, bzip2, cabextract, gzip, tar, zoo ...)
- driver - Free drivers for network cards and usb
- edit - A collection of editors (emacs, vim, pg, setedit, ospedit)
- games - A good choice of free DOS games - Doom, Solitare, BumpNJump, nethack, tetris...
- gui - Gem Desktop (Very nice)
- lang - Free compilers and assemblers (Pascal,C,Basic,assembler,Fortran, debuggers,make tool...)
- media - Free multimedia applications (cdrtools, ogg vorbis, mpxplay,lame ...)
- net - Networking programs (wget, VNC, SSH client, lynx, arachne, mail client, wattcp - a free TCP/IP stack for DOS).
- util - Free file, directory and other utilities (fprot anti virus, locate, head, du, cal, dos32ax, tail, tee, 4dos, uptime ...)
It is prudent to select all the packages to enjoy the full functionality of FreeDOS. Next a list of programs from each package where we could fine tune our choice of programs is shown. More specifically, FreeDOS ships with two kernels - the stable one called 'sysx' and the unstable kernel named 'unstablx' and we could choose one from the other. The unstable kernel has support for Enhanced Mode Win3.1 and some DOS programs require this to work properly. So select the unstable kernel and the copying of files starts.
It will take about 15-20 minutes to install all the packages. Then FreeDOS starts configuring the parameters. Next it will prompt us to choose a packet driver. There is a packet driver for Qemu provided which we can select. Following which it will be prompted to install the OpenGEM GUI.
Post installation, FreeDOS starts configuring certain aspects and asks a couple of questions such as the address of the mailserver, the email id and a few other parameters.
Starting to use FreeDOS in GNU/Linux
Once installation is over, boot FreeDOS in GNU/Linux using the following command:
qemu -hda freedosfile.img -boot c
Shortly you will be placed into c prompt
That's all
Enjoy the power of FreeDOS in your system.
INSTALLING QEMU IN UBUNTU/DEBIAN LINUX
Labels: Assembly Programming, Computer, Freedom Beats

QEMU is a generic and open source machine emulator and virtualizer. When used as a machine emulator, QEMU can run OSes and programs made for one machine (e.g. an ARM board) on a different machine (e.g. your own PC). By using dynamic translation, it achieves very good performance.
QEMU is a processor emulator that relies on dynamic binary translation to achieve a reasonable speed while being easy to port on new host CPU architectures.In conjunction with CPU emulation, it also provides a set of device models, allowing it to run a variety of unmodified guest operating systems; it can thus be viewed as a hosted virtual machine monitor. It also provides an accelerated mode for supporting a mixture of binary translation (for kernel code) and native execution (for user code), in the same fashion as VMware Workstation and Microsoft Virtual PC.
QEMU can also be used purely for CPU emulation for user level processes; in this mode of operation it is most similar to Valgrind.
One feature exclusive to QEMU is that of portability: the virtual machines can be run on any PC, even those where the user has only limited rights with no administrator access, making the "PC-on-a-USB-stick" concept very real. Similar applications exist (such as MojoPac) but they currently require administrator rights to run, making them useless in areas such as public libraries, internet cafes, and so on.
INSTALLING QEMU IN UBUNTU/DEBIAN LINUX
Enter the following command without quotes "sudo apt-get install qemu"
Wednesday, September 22, 2010
QUANTUM COMPUTERS
Labels: Computer, Tech Updates

Since the invention of integrated circuits, there has been a tremendous increase in chip density, drastic decrease in chip size, followed by reduction in power consumption. But how far this could go further, so as to maintain Moore’s law? This is the question which shook the semiconductor industry and the leading scientists in this field. Today we are in a stage where semiconductor industries are reaching their limits and getting saturated. And now various studies and researches unanimously point to very unique solution - The Quantum Computer. Quantum computers will be the next greatest leap to satisfy humans ever found quest for better computing speed, power and accuracy. In addition quantum communication is yet another break through in wireless communication.
Quantum computers are future computers which work on the principle of quantum physics. At present in electronic computers and devices, the fundamental component is transistor and associated circuits. But in quantum computers, the fundamental components are molecules, atoms and even electrons. Here the classical physics fails to explain the extra ordinary phenomenon. But quantum physics is well capable of it to some extend.
In electronic computers, fundamental unit of storage is bit. It can posses two values – 0 or1 (high or low, ON/OFF…..etc). At a particular instant of time a bit could attain only one state. In quantum computers bits are replaced by qbits. A qbit could attain a value, either 1 or 0 or both at a particular instant of time. The value of qbit depends on how we read it. It is this remarkable feature which lifts up quantum computers to the top of everything. It is this unique property which tremendously increases its computing power as well as efficiency.
Bits are represented either as a presence or absence of charge in capacitors or as whether the transistor is ON/OFF etc. But a qbit can be represented as the direction of spin of electrons in an atom. For example a clockwise spin would represent a qbit=1 and an anti-clockwise spin would represent a qbit=0.
 Consider a group of n bits. It could represent 2^n states. But only one state at a particular instant of time. Thus it is deterministic. Regardless of the way we read this, its state remains same for all the connected parts in a circuit. But in the case qbits the situation is different. Qbits could represent 2^n states. In addition it could attain 2^n states simultaneously at a particular instant of time. In other words, the state of qbit depends on how we read it. Thus if could develop sufficient technology for reading and writing qbits, the result would be an increase in computational power by a factor of 2^n. Thus even a minimum level 12-qbit quantum computer would far exceed present day’s best super computer.
The use of quantum materials in communication is yet another upcoming revolution. It is proved that the state of two materials which have a quantum relation remains same, regardless of their separation. Thus a change in state of one of the quantum related material would make a corresponding change in its counter part. Even if these are kept in various solar systems, these materials will track each other’s changes instantaneously. If we could exploit these materials for our communication, the result will be a better, faster and secure communication with almost unlimited range. Though the above mentioned ideas are theoretically proved, the technology is still far below to put these things in to practical. But the higher rate in development in this field gives us a better hope.

Recently a Chinese researcher succeeds in testing quantum communication up to a distance of 16km. Also major powers of computing industry are pushing their R &D towards quantum computers. A very few 8-qbit and recently 12-qbit quantum computers are developed. But none of these are up to the mark and were not standardized.
We could certainly dream about an era of quantum computers. But at present if some one succeds in building a quantum computer, the data on the networks, internet etc are no more secure. Because the quantum computers could decode even the best encryption algorithms within a fraction of a second !!!!!!!!!!
Friday, September 10, 2010
Fixing MBR of Windows XP Service pack 2
Labels: Computer, Windows XP
MBR ( Master Boot Record) plays a crucial role in system booting. If this is corrupted or overwitten, your system may fail to boot. MBR or partition sector is the first 512 byte sector of your partitioned hard disk which the BIOS initially access to load the OS. MBR problems usually occur in multi OS sytem where GRUB comes into action. One of the most simplest method is to rewrite the MBR using the Windows XP Service Pack 2 installation CD. Steps are as follows
Note: This method will work only for windows XP. This will wipe out your GRUB so that you will not be able to boot into any other OS.
Disclaimer notice : We will not be responsible for any problem ( physical and financial ) which arises while performing above steps. Do it in your own risk.
- Insert the CDROM into the drive.
- Boot into the CDROM.
- First screen which appear will have an option to repair. Now press 'r ' to repair.
- Now it drops to command line. It will then ask you to select the required Windows installation of which MBR is to be fixed. Make the selection and give the password when prompted.
- Type the following command without quotes.
- Sometimes it may warn you. In that case you just give yes ('y').
- Now type " REBOOT " and the system will reboot. Make sure to take out the disk.
Note: This method will work only for windows XP. This will wipe out your GRUB so that you will not be able to boot into any other OS.
Disclaimer notice : We will not be responsible for any problem ( physical and financial ) which arises while performing above steps. Do it in your own risk.
Wednesday, September 8, 2010
Removing Windows Programs In XP
Labels: Computer, Windows XP
Some times we might have to remove the stuffs like windows messenger,MSN Service etc. A simple method is to go to control panel and open add or remove programs. There you could see a tab " Add/ Remove Windows Components" on the left side. Click on it. Now Windows component wizard appears and now you can uninstall various programs by unchecking the corresponding check boxes. After unchecking the check boxes click on "Next" button to start uninstalling.
Subscribe to: Posts (Atom)
Search This Blog
Labels
- 8051 (2)
- 8086 Programs (13)
- Assembly Programming (18)
- C Programs (6)
- Circuit Debugging (2)
- Circuit Lab (12)
- Computer (31)
- Computer Dictionary (3)
- Debian (2)
- Electronics (20)
- Engineering (1)
- Fedora Electronics Lab (3)
- Freedom Beats (6)
- GNU/Linux (5)
- Hacking (3)
- Internet (4)
- Linux (13)
- MASM (4)
- MATLAB (16)
- Microcontrollers (3)
- Networking (2)
- OS (1)
- Parallelport (7)
- PIC (4)
- Programmers (1)
- Programming (6)
- Projects (2)
- Seminars (1)
- Stepper Motor Programming (4)
- Tech Updates (27)
- Ubuntu (20)
- Windows XP (12)
Followers
About Me

- Anil C S
- Thrissur, Kerala, India
- I am a B.Tech student at Jyothi Engineering College, Cheruthuruthy, Thrissur
Status


